Our Biggest Day Yet: Pouring Concrete!
May 24, 2025
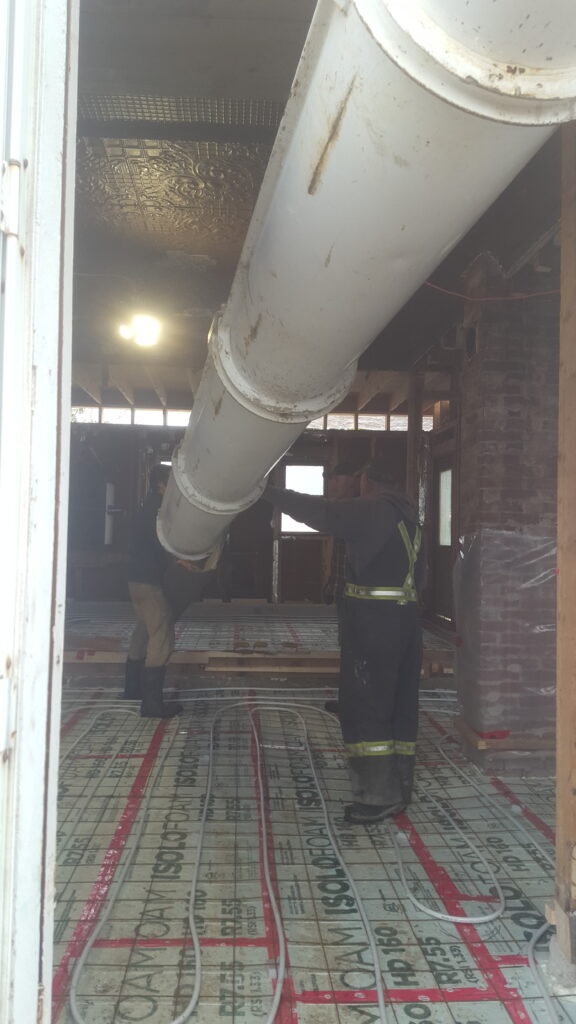
Concrete pouring day has finally arrived! In preparation for the big day, Michiel and I spent many days cleaning, checking the radiant floor pipes, and making sure there are no gaps in the floors or walls where concrete can leak out. It has been a nerve-wracking week wrapping our minds around the details surrounding managing the tasks upon arrival of the concrete truck. Since Michiel is not an expert in dealing with concrete, he would spend hours running various scenarios in his head while trying his best to address the potential issues that could arise.
Timing is Crucial
The timing of pouring our concrete floor couldn’t have come on a better day–weather-wise. The more cooler temperature and overcast sky helped to slow down the drying process, enough for Michiel to smooth out the concrete, and for us to stamp the slate/bedrock design successfully on the setting top layer. Having three large square stamps and one small one (to do hard to reach places or to correct a spot) meant having to plan our route through each room in the house, preferably in the order of where the truck poured the concrete. We would do the finger poke test to see how stiff the concrete has gotten before committing to stamping. Concrete that is too wet will not take the design of the stamp.
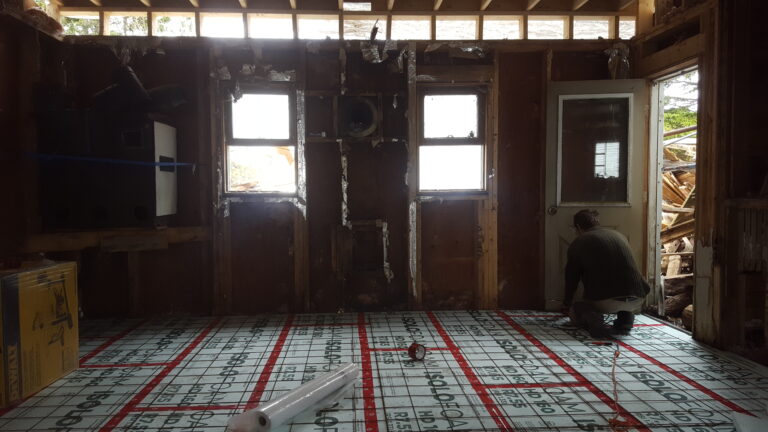
Main Floor Ready for Concrete
On the morning of, after cleaning up the rooms, removing all tools; equipment; left-over materials; and vacuuming the wooden guides (ledges) where the screeding board will float atop to level the concrete, Michiel and I felt more confident about the daylong task of creating a beautiful, textured floor throughout the main level of our home.
We have been feeling both angst and thrill, days before this big important day–all wrapped tightly in a ball. It was truly a mix of fear and motivation. If anything goes wrong, the permanence of our new floor will have us dread its existence for an unforeseen period of time, until we find a solution to have it fixed. However, we have set ourselves up, working out all the details–major and minor, of how we would go about the business of having this floor poured. We know that we can’t be over-prepared for this task, if we want the end result to be as close as possible to how we had envisioned our permanent floor to be. The preparation efforts for this stage in our renovation journey has by far, required the most planning and physical work.
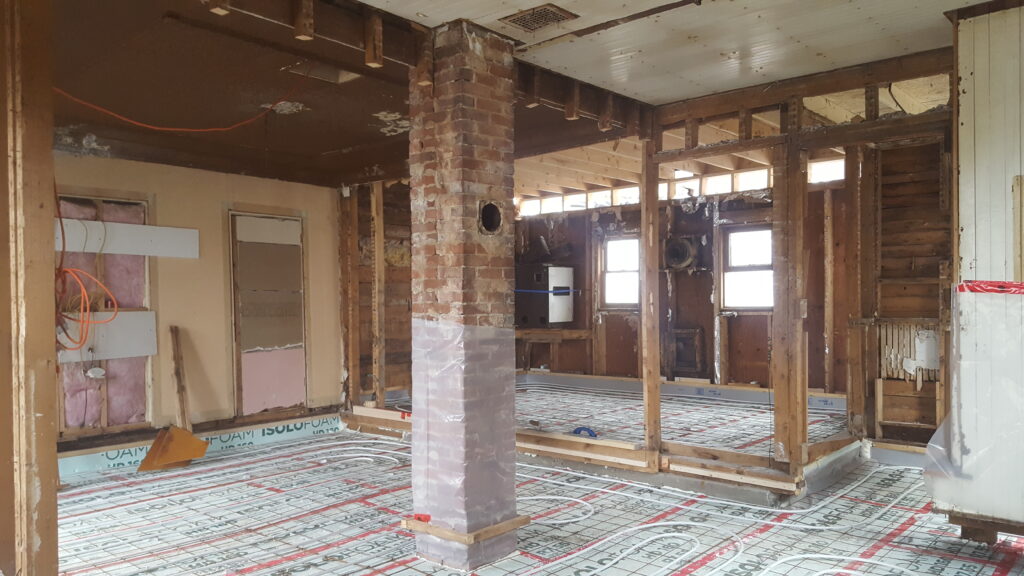
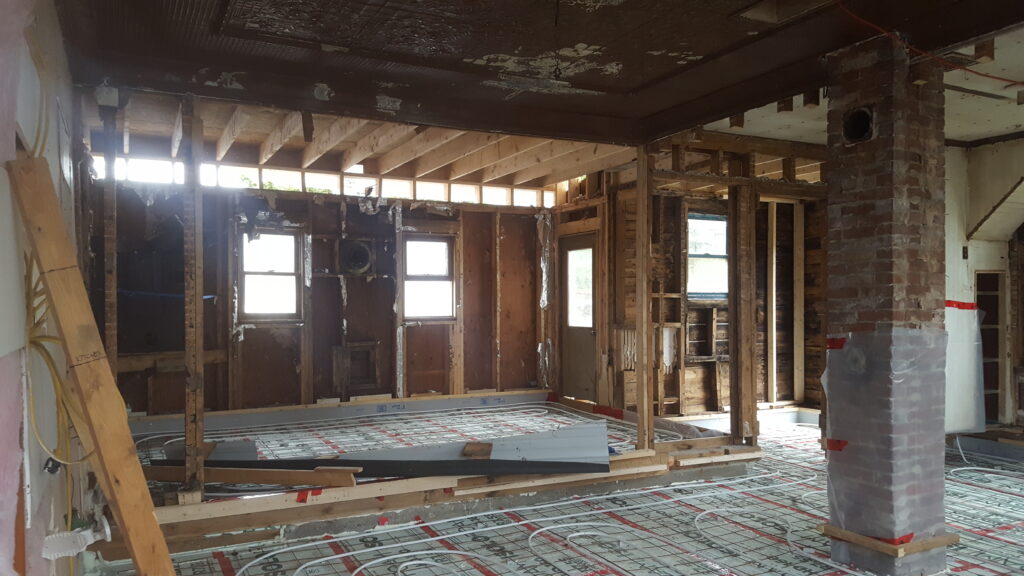
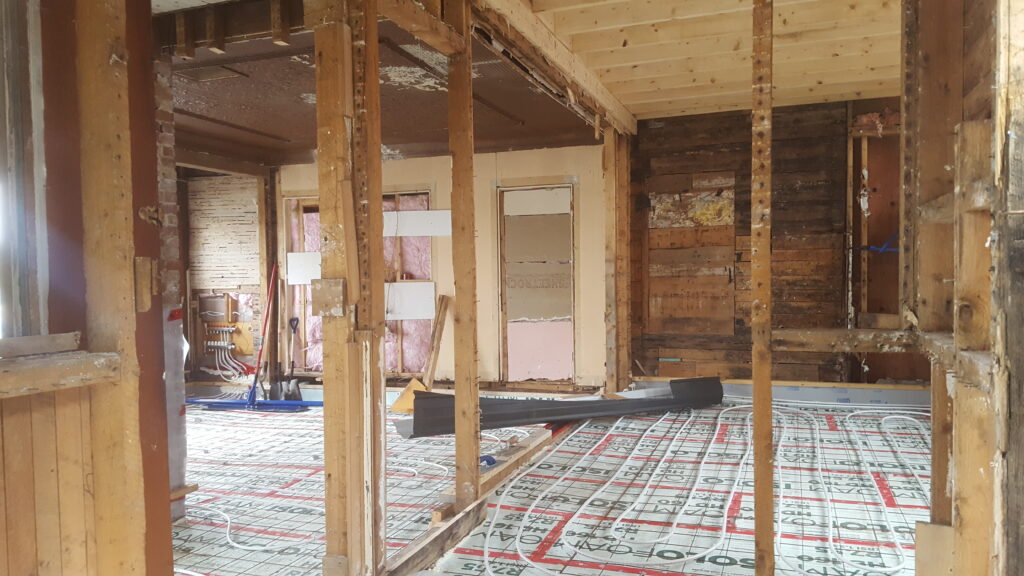
A small but important detail not to be missed, is the fact that the Pex tubes installed for our radiant floor heating needed to be pressurized before pouring concrete–for the reason of protecting the tubes from being crushed or punctured in the concrete pouring process. It was also wise to make sure there were no leaks in the tubes before permanently fixing them inside the concrete.
To our delight, the pressure remained constant throughout the whole day, and there we can confirm without a shadow of a doubt that there were also no leaks in the tubes!
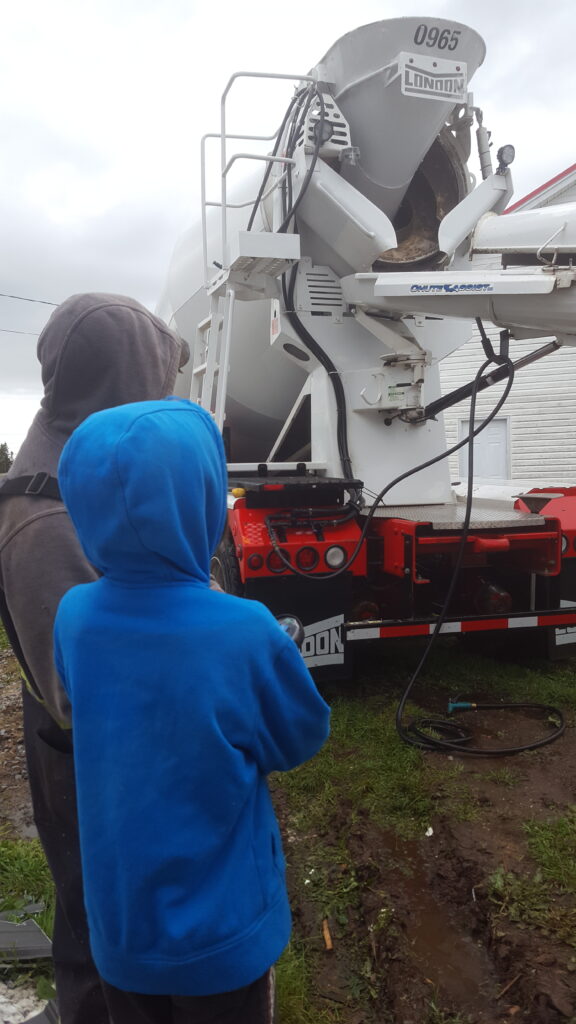
Step 1: Concrete Pouring
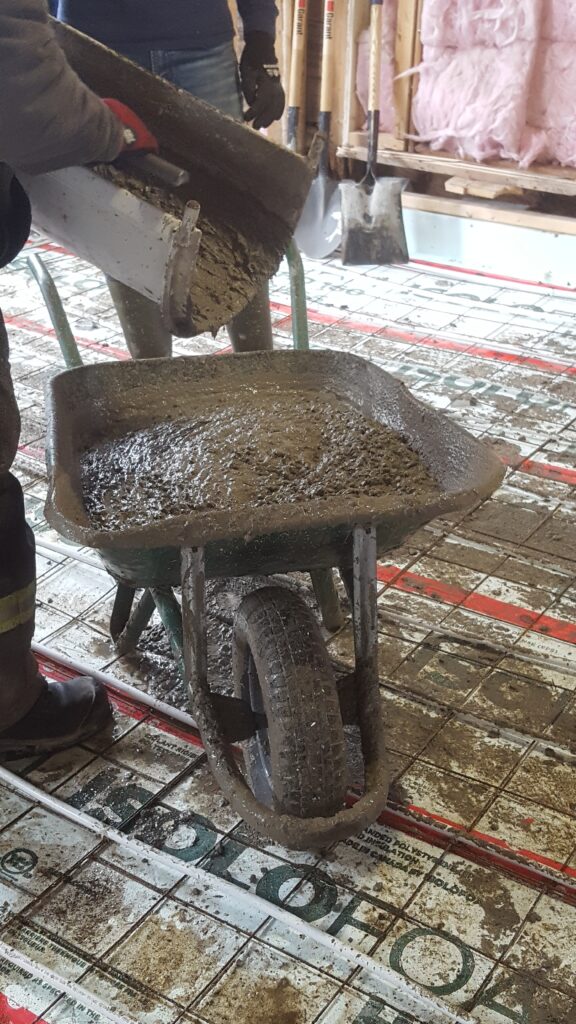
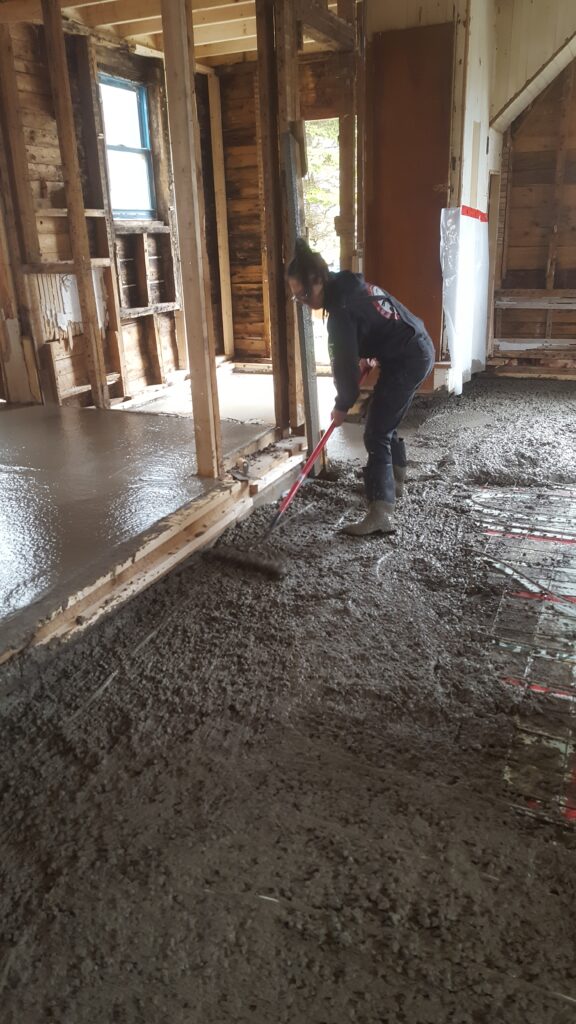
The big concrete truck arrived fifteen minutes early that fine morning. The driver carefully backed-up the vehicle with the spout pointing directly at the wide open, front entrance of our house. Michiel gave him the o.k. to start letting the concrete slide down the chute and into the wheelbarrow. The concrete was then wheeled to different sections of the home with a wheelbarrow–starting with the furthest corner in the kitchen, and across the entire room, overtaking the little mudroom (or porch), then finally finishing in the living and dining room.
Step 2: Levelling Concrete
As the concrete continued to be released down the chute and into the wheelbarrow, I helped rake and distribute the concrete already poured on the floor. I think it’s incredible that there are professionals who do this on a daily basis, as their full time job. It is an admirable job requiring stamina, strength, and a planning–and concrete is a necessary and fundamental building material used in building various types of infrastructure.
Concrete work is intensely laborious–heavy lifting, pulling and pushing, not to mention the mental pressure of having to race against the ticking time, to have done all the necessary steps before the concrete hardens. We definitely felt that pressure while working. The driver overheard our conversation–so he added more water to slow the hardening process.

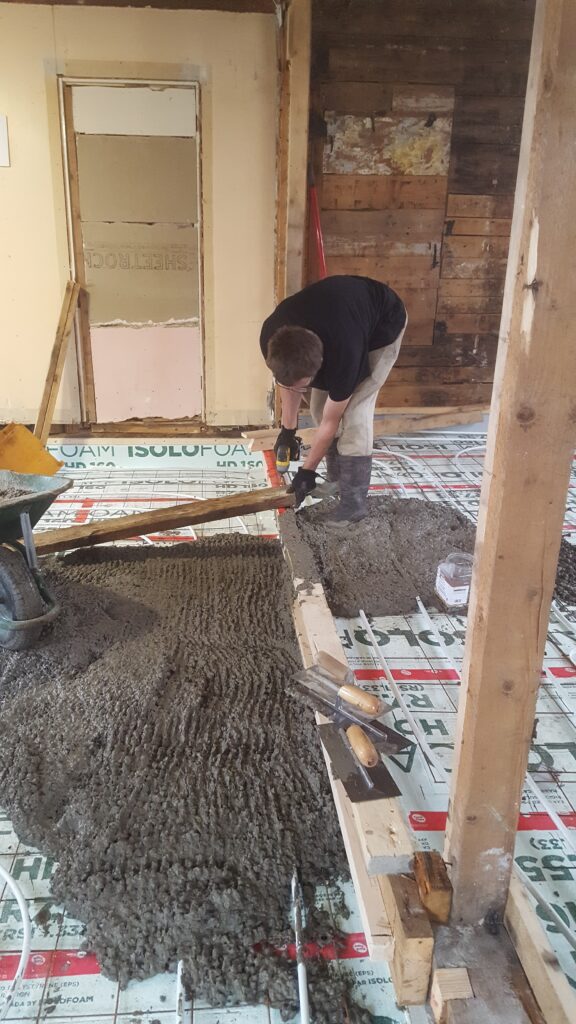
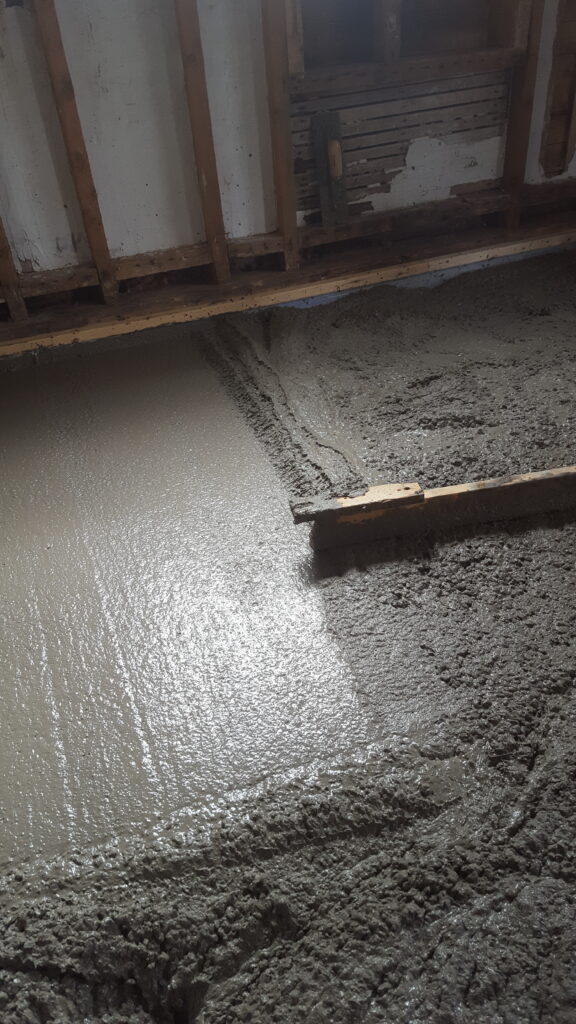
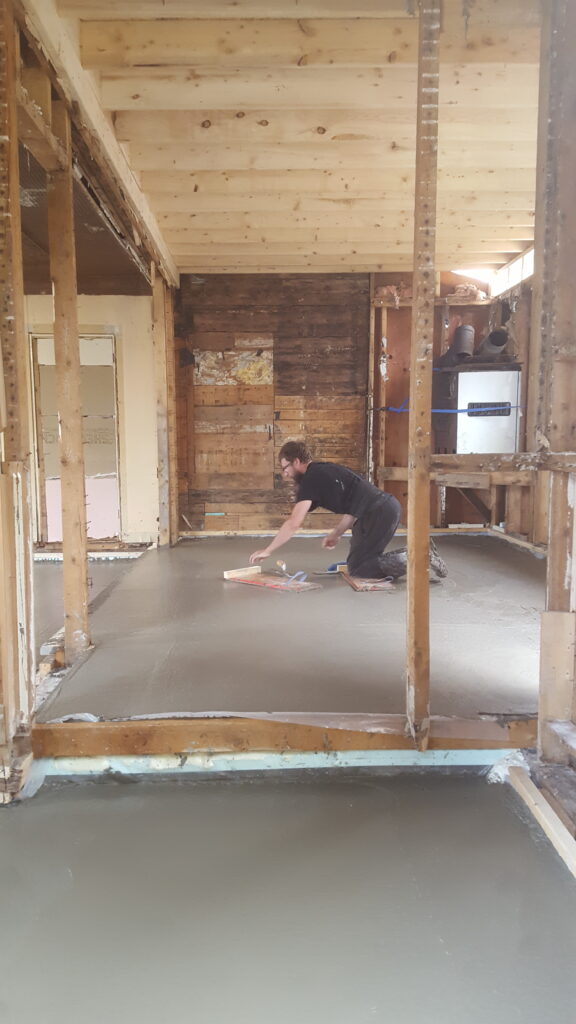
Step 3: Screeding & Measuring Floor Height
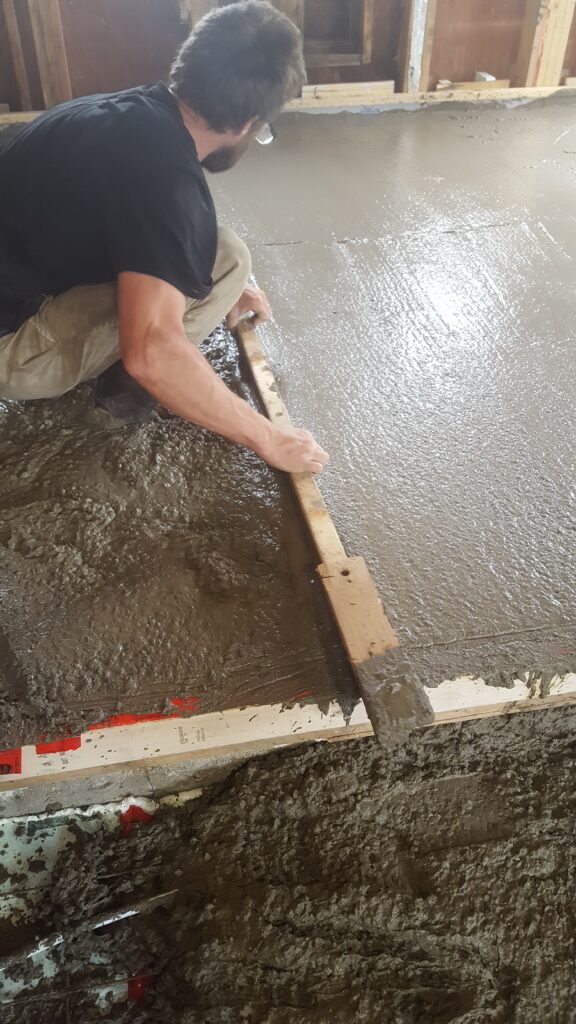
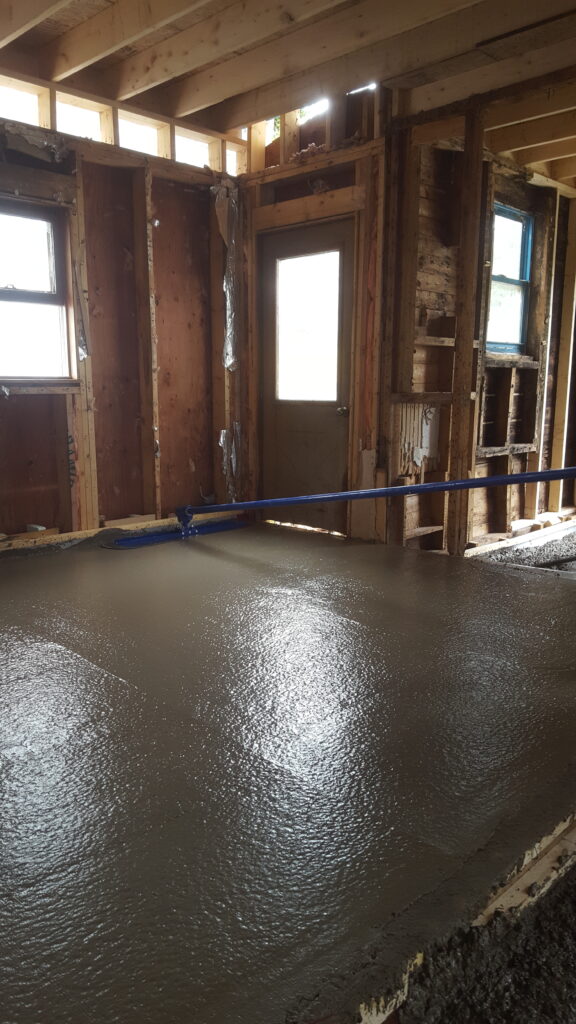
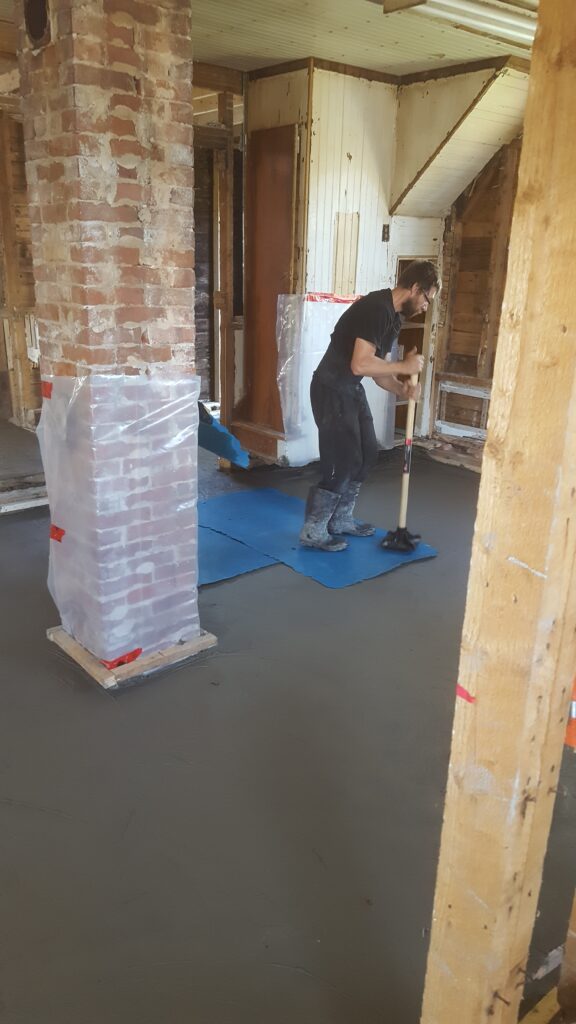
Michiel had systematically planned the order of which location in the house the cement would be delivered. As the concrete was wheeled and poured across the floors, Michiel worked quickly and diligently to smooth and level the concrete with a screed board he had assembled the week before. Also known as screeding, he would wiggle the long board–with gentle vibrations, just above the concrete, removing any excess bits that would otherwise render the final height of the floor too high. With a laser level sitting in the wall stud, aimed at the entire span of the home’s interior, he could work away with ease knowing that the screeding he is doing is in line with the height he had in mind.
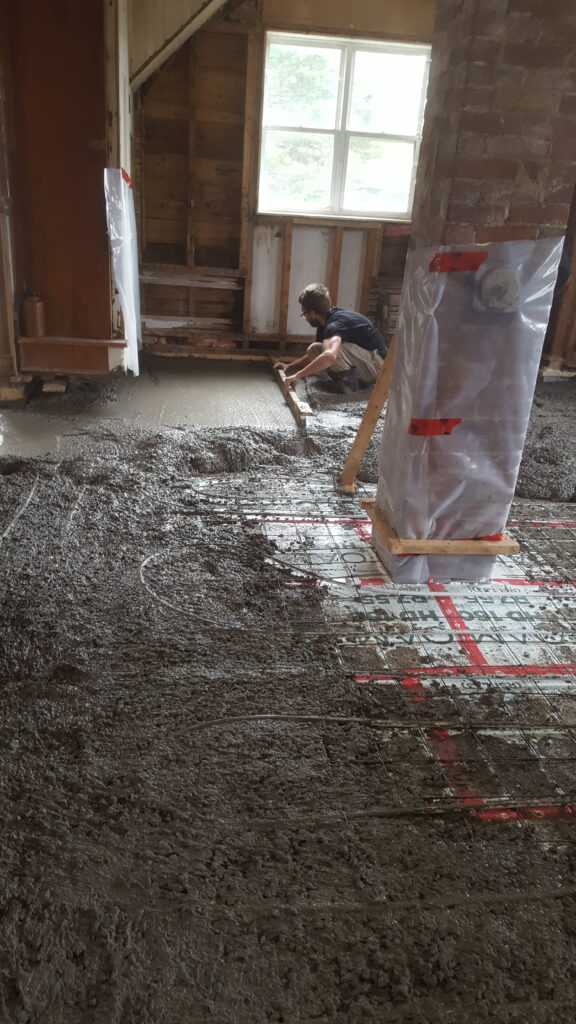
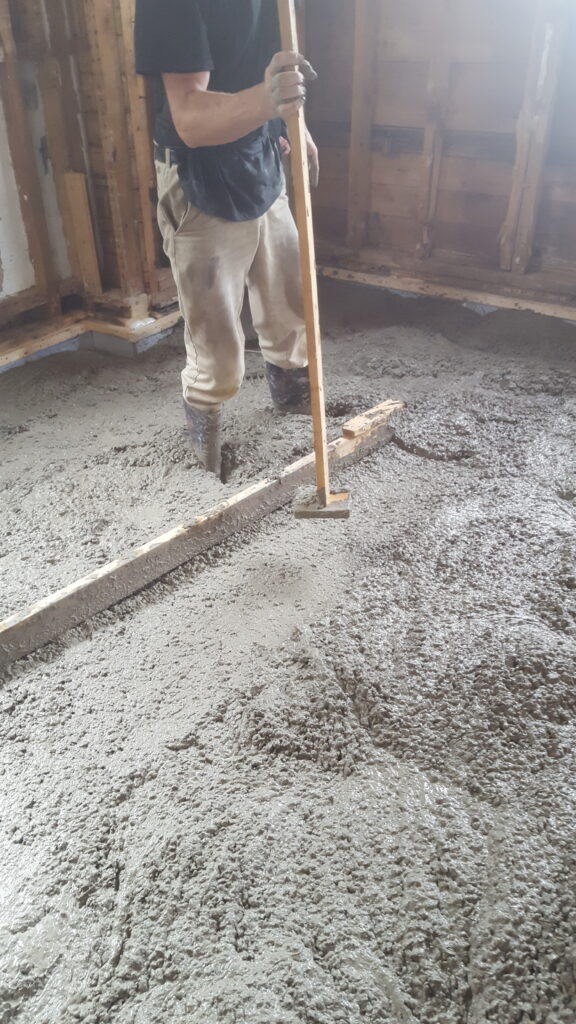
Along with using a laser level for measuring height, Michiel also built a “measuring” stick. This particular device had lines drawn on the board of the desired floor height. All that had to be done was to place the flat square of the stick on the surface of the concrete while taking note of where the green line produced by the laser level touched the stick. If the laser line landed above the drawn line, this meant the floor is too low, and we would have to add more concrete to increase the height. If the laser line landed below the drawn line, the opposite was true, and we would have to decrease the height of the floor by removing some concrete.

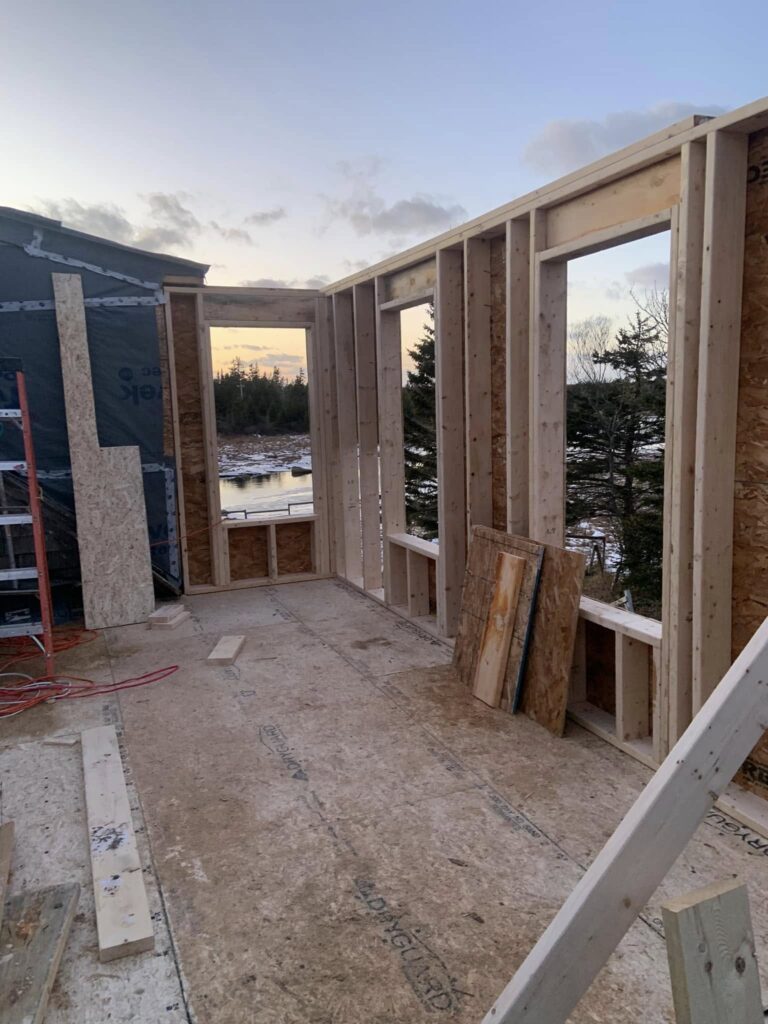
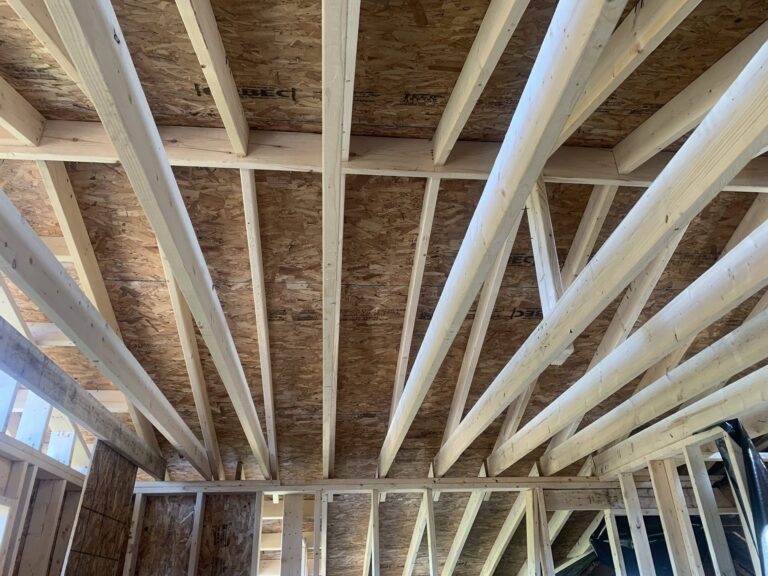
During the gutting stage, when we had removed the floor in its entirety–including the floor joists and beams, and Michiel chipped away some boulders that were in the way, we decided we wanted an overall taller ceiling height throughout our main floor. As such, we took full advantage of this current concrete pouring stage to adjust the eventual floor-to-ceiling height of our home. It was the time to do it. And we are so glad we did!
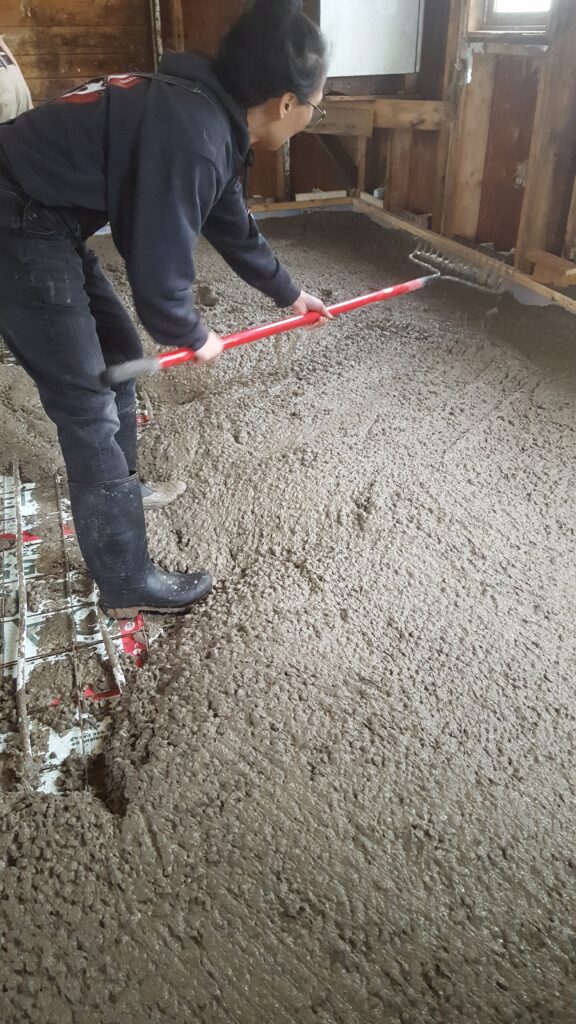
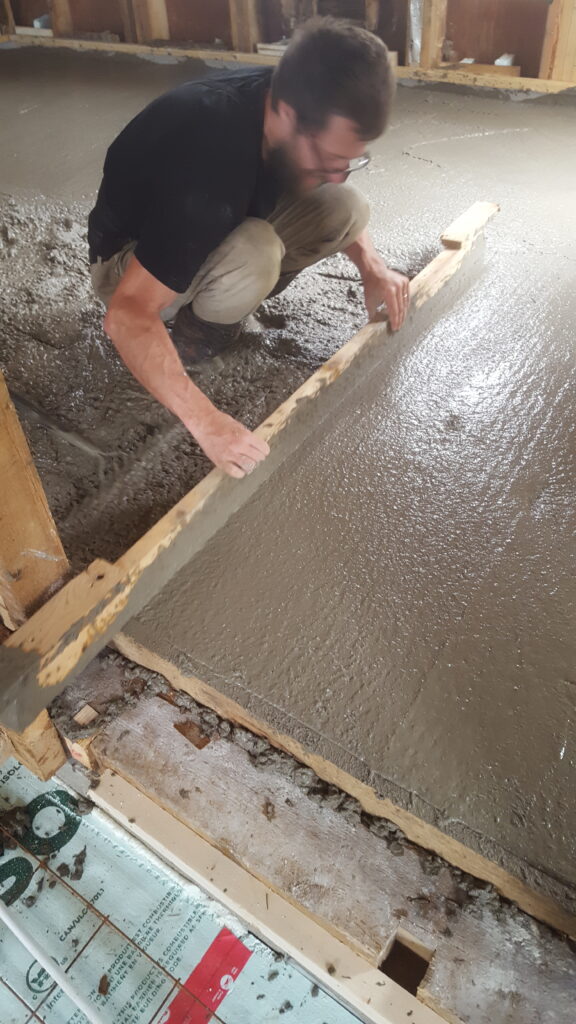
Step 4: Smoothing the Surface with a Bull Float
A wonderful tool that resembles a snowboard on a long stick was useful in further smoothing the wet concrete after the screeding process. This step ensured a surface that was free from any inconsistencies, such as small bumps and lines left behind by the screeding done before-hand. The device was equipped with three sections of light-weight, aluminum bars that clicked together to form various lengths for a handle–allowing a far-reaching distance to be had when smoothing the surface, all the while avoiding stepping on the concrete. The sound of the Bull Float sliding across the room was both satisfying and surprisingly relaxing!

While we approached the final steps of creating a concrete floor, our two youngest kids were outside trying out the remote control to raise and lower the concrete chute on the back of the heavy truck. The driver was kind enough to show the kids how to operate some of the features on the truck, including tooting the, loud, booming horn inside the truck’s cabin.
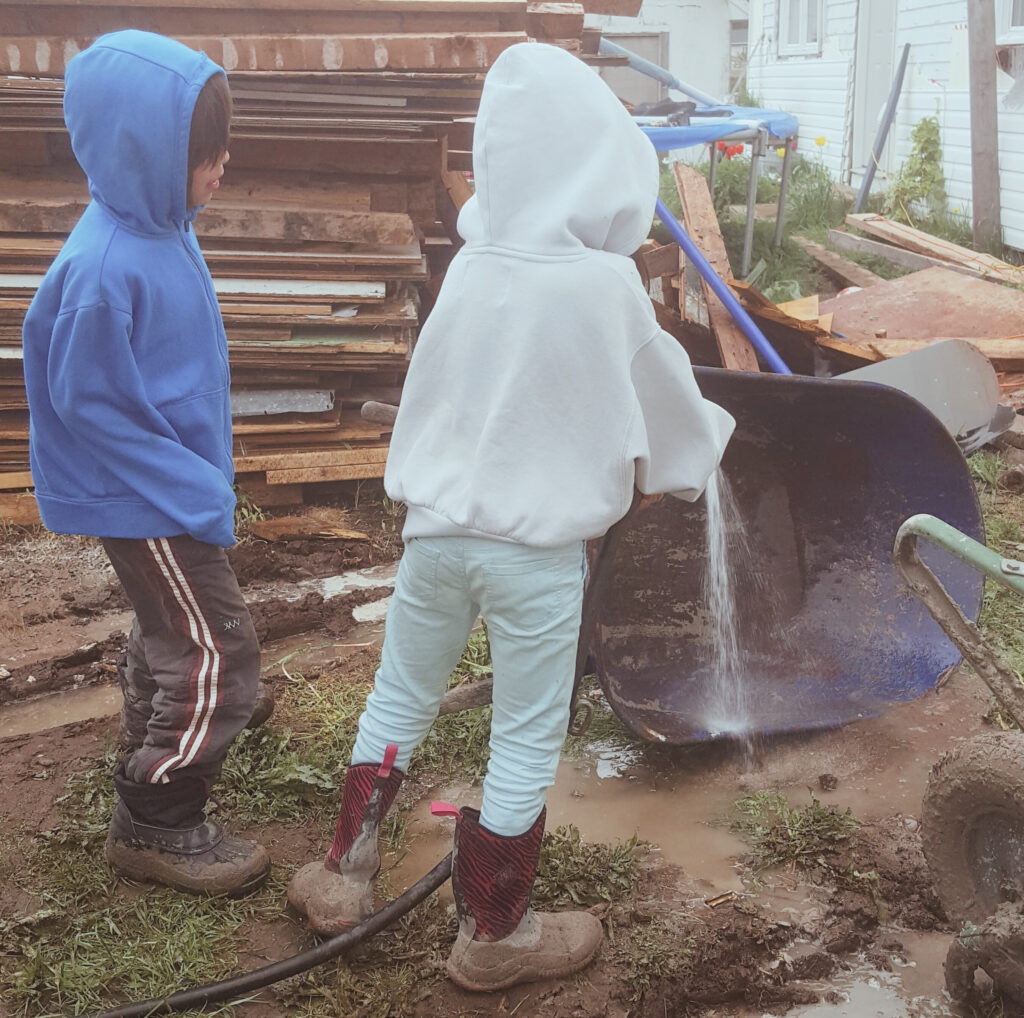
The kids did their part to help today. They used the water hose from the truck to clean all tools and equipment used to haul, spread, and smooth the concrete. Then we said good-bye to the driver and the truck as they rolled away over the hill and onto the road–back to their station.
After a long morning of physical work, it was high time to have a lunch and coffee break while waiting for the concrete to harden before moving to the next two steps.
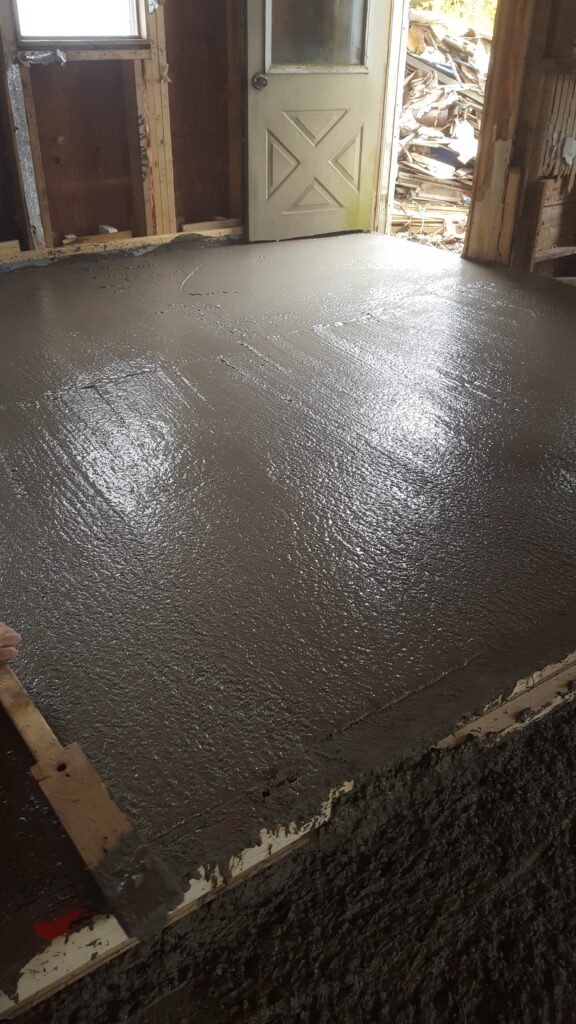
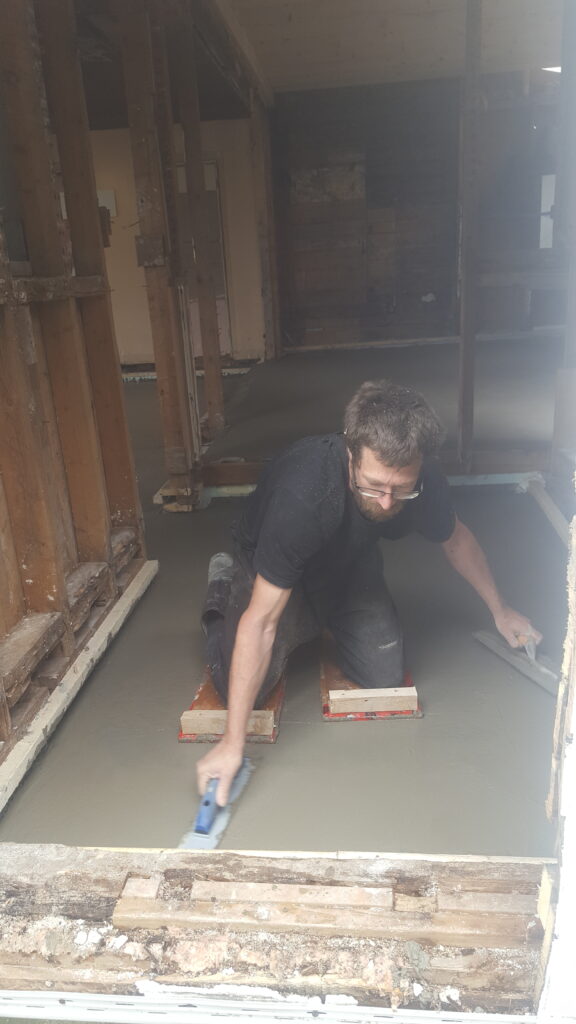
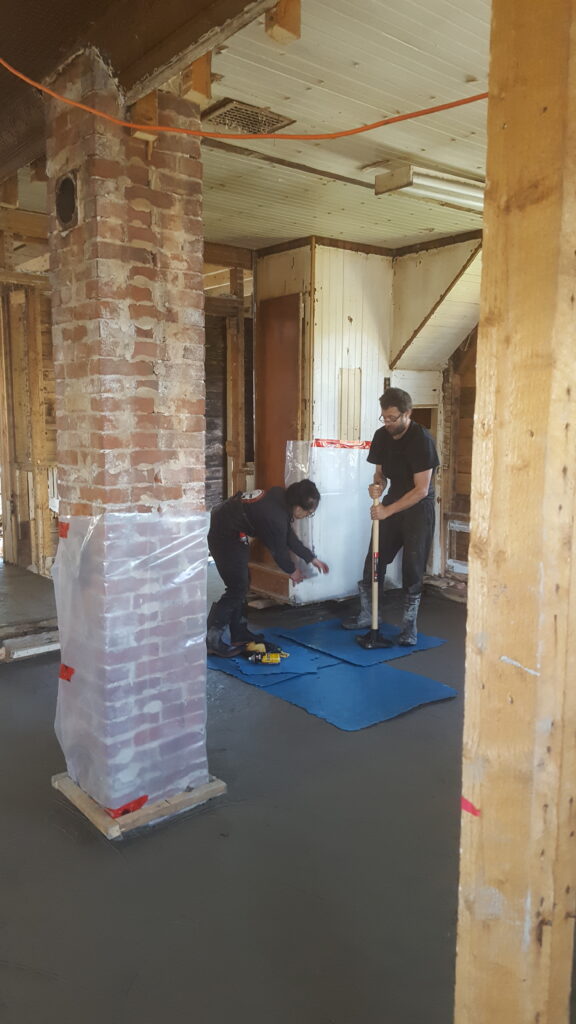
Step 5: Using Magnesium Trowel to Bring Cream to the Top
The top layer became soft again after Michiel troweled the concrete. This was an important step in preparation for the next step of stamping the concrete with our mold. Michiel built a pair of knee boards to help him glide along the semi hard concrete, while using a regular trowel in one hand to keep balance, while using a magnesium trowel in the other hand to scrape a thin layer of concrete. His moving across the floor resembled a methodical dance choreography, his one knee gliding forward while both his hands were on the trowels for balance, and then his other knee gliding forward, while he swung with the magnesium trowel in large, swift, semi-circles on the concrete, scraping and creating a smooth top layer.
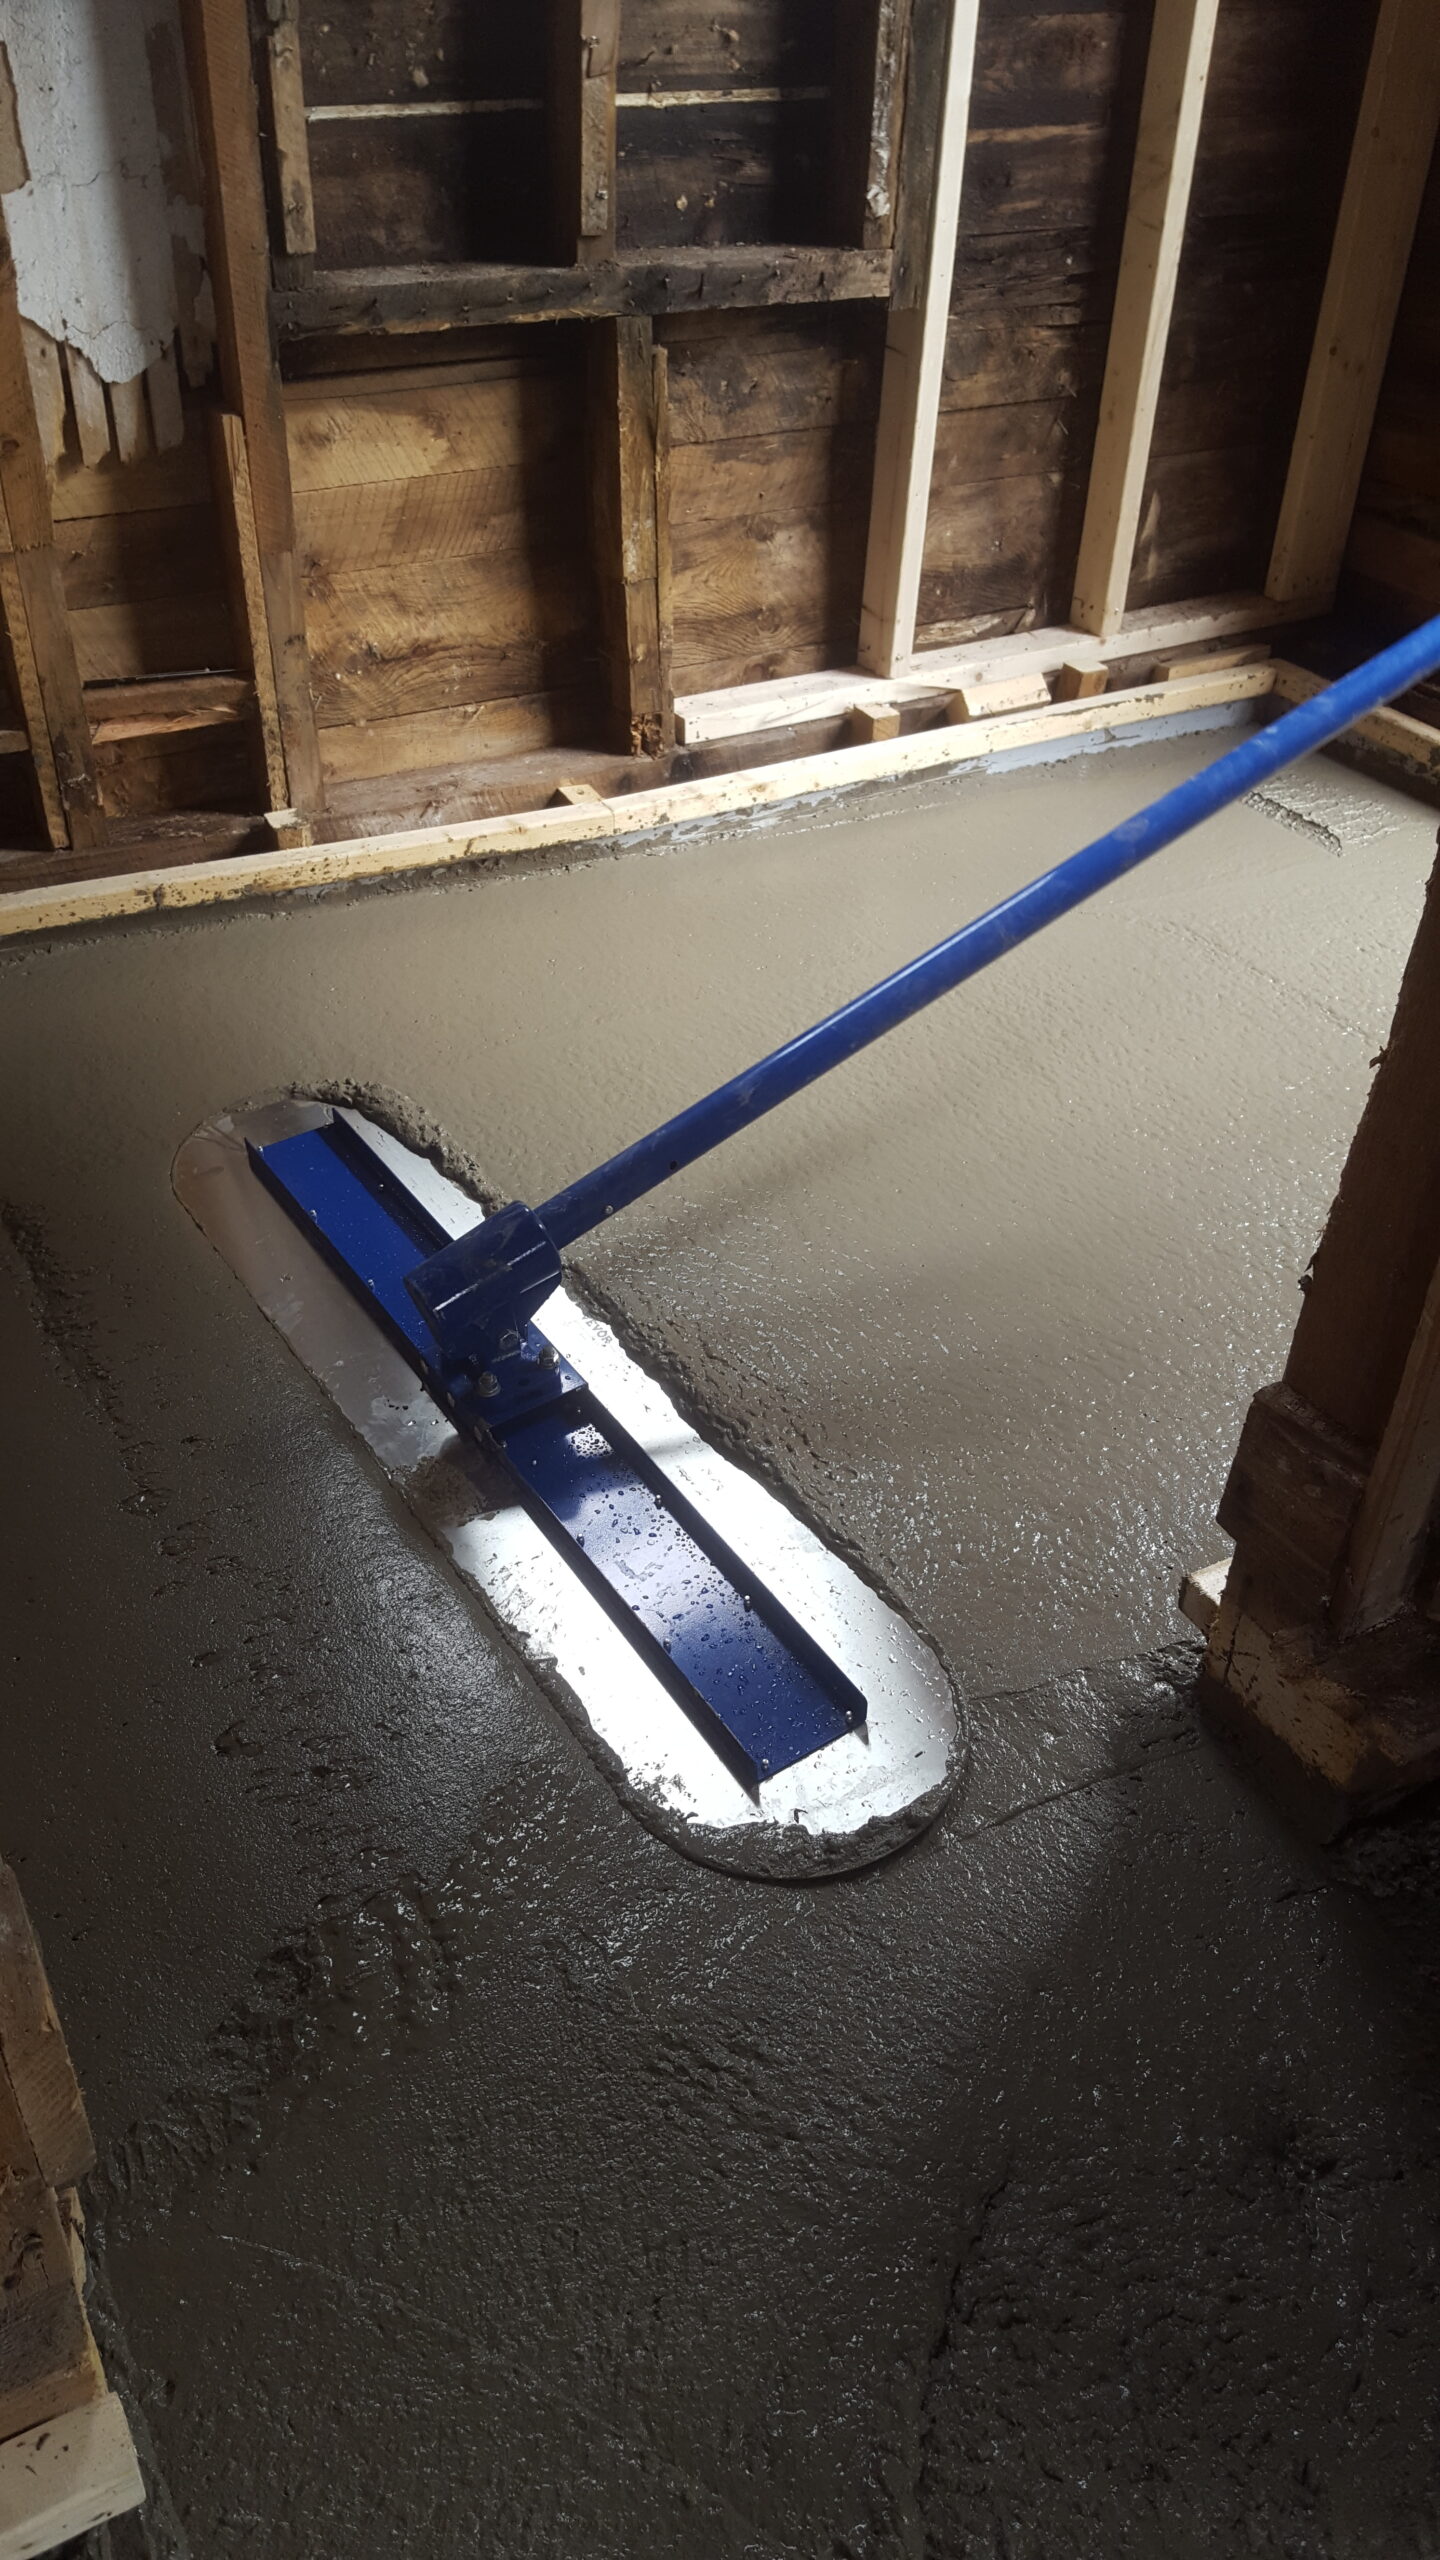
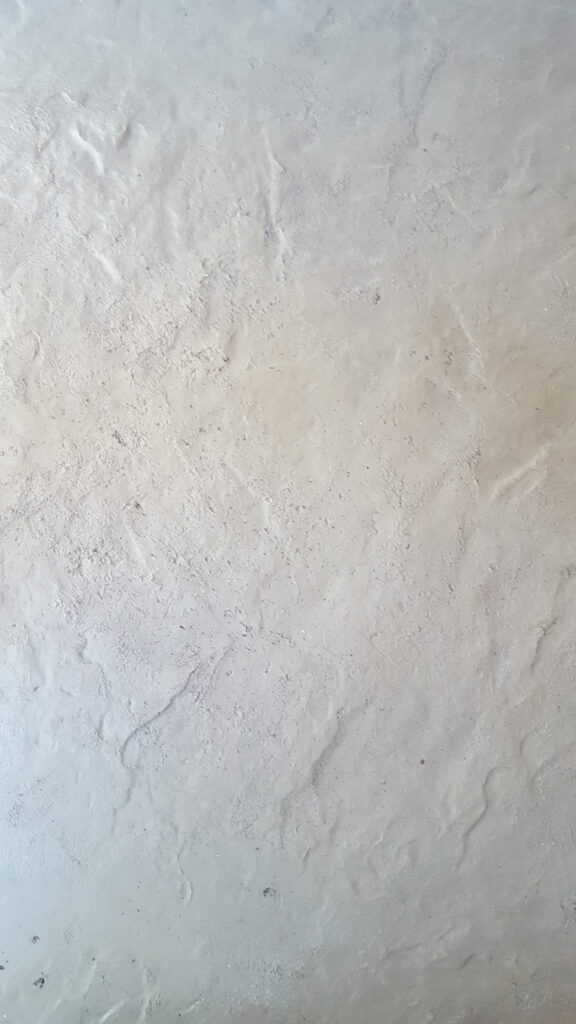
Step 6: Stamping Using our Bedrock/Slate Mold
The process of moving the stamps, rotating them, lubricating them with a silicone spray (release agent), then tamping them on the concrete was not too strenuous–just keeping a watch on the ticking clock added a certain amount of unease as we moved along.
The space needed to be stamped was quite large, and altogether with the three large stamps, we had to be sure that we could move efficiently across the entire floor before the concrete sets. We first started in the kitchen, then moved into the mudroom, then into the living room, into the dining room, and finally out the front door.
As the time ticked, we stamped harder, needing the imprint to be well pronounced with each square placed on the hardening concrete.
Michiel and I found a rhythm that we followed from beginning to end. I had the release agent ready–one in my pocket and the other in my hand. As we put down each mold, stamping, and lifting them back up–we made sure to spray the release agent on the mold in abundance before setting it down to be stamped again. This process ensured there was no sticking occurring. I was also prepared with the smaller mold square to correct any spots where the large molds missed.
Of all the steps, this one in particular was the most satisfying. We are finally seeing the final design of our home’s permanent floor! Even though it was not the most “back breaking” process, it was the last stage–and Michiel was especially exhausted from the previous five steps. From beginning to end, the stamping process took two and a half hours. After finding out what time we ended, we were happy to realize that we finished just in time for the kids to go to their first soccer practice of the season!
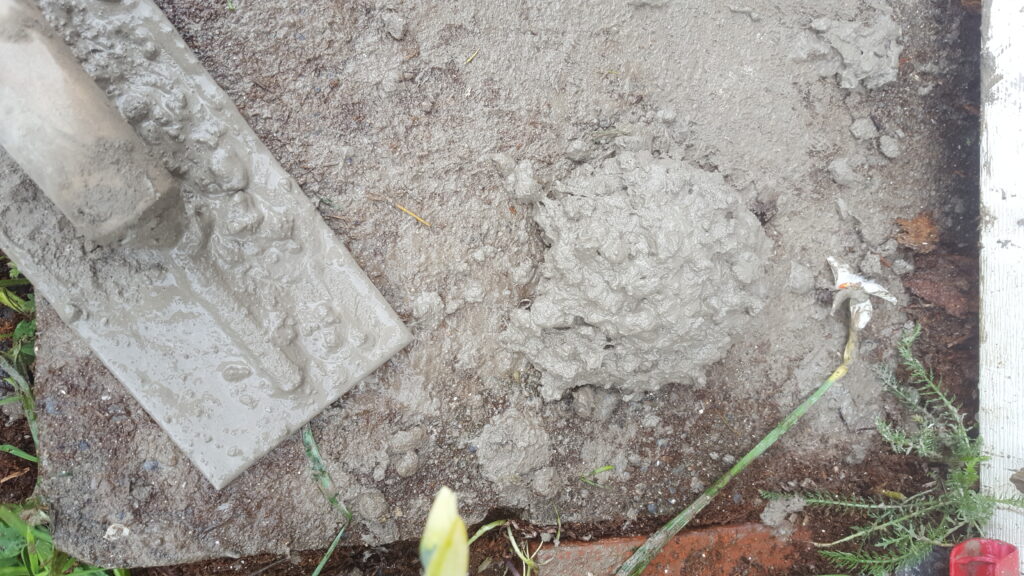
Michiel was so sure to have ordered the right amount of concrete (and even a little extra) needed to cover the entire floor, that if he had asked for even a slight bit less, we would have had to make due with an unlevelled floor. We realized after the fact, that what we needed to account for before ordering concrete, were the occasional dips under the styrofoam–which created slumps, thus needing more concrete in order to have the floor be completely levelled.
We had a moderate dose of doubt that we would finish the project with enough concrete, so our truck driver advised us to add some gravel under the wet concrete as a filler. And that we did!
A tiny portion of the concrete was left over from the entire process–scraped off the hardening concrete and brought outside onto the front step for everyone to see! We were definitely on the brink of not having enough concrete for this project–but, we made it through, and we are so thankful we finished with just the right amount!
Another major milestone achieved this week! What a wild ride this particular project has been!
Thank you all for your continued encouragement and prayers! We hope you are enjoying reading these posts as much as I am writing them.
Good night and sweet dreams to all of our dear friends and family!
Wow! What a labor or love. It looks great but I don’t know if I could have done that. What a wonderful project. I’ll be following along to see more project be completed.
Hi Mary! It is definitely a labour of love. The end result will be worth it! Thanks for following along. I hope you enjoy reading our family’s adventures!